It’s kitchen time!! I mean, who doesn’t love to plan their dream kitchen? I bounced around A LOT with the overall design of the space mainly because I couldn’t decide on paint colors, but we struggled for a bit with the layout too. Let’s start with one of the first images that I pinned for the kitchen.
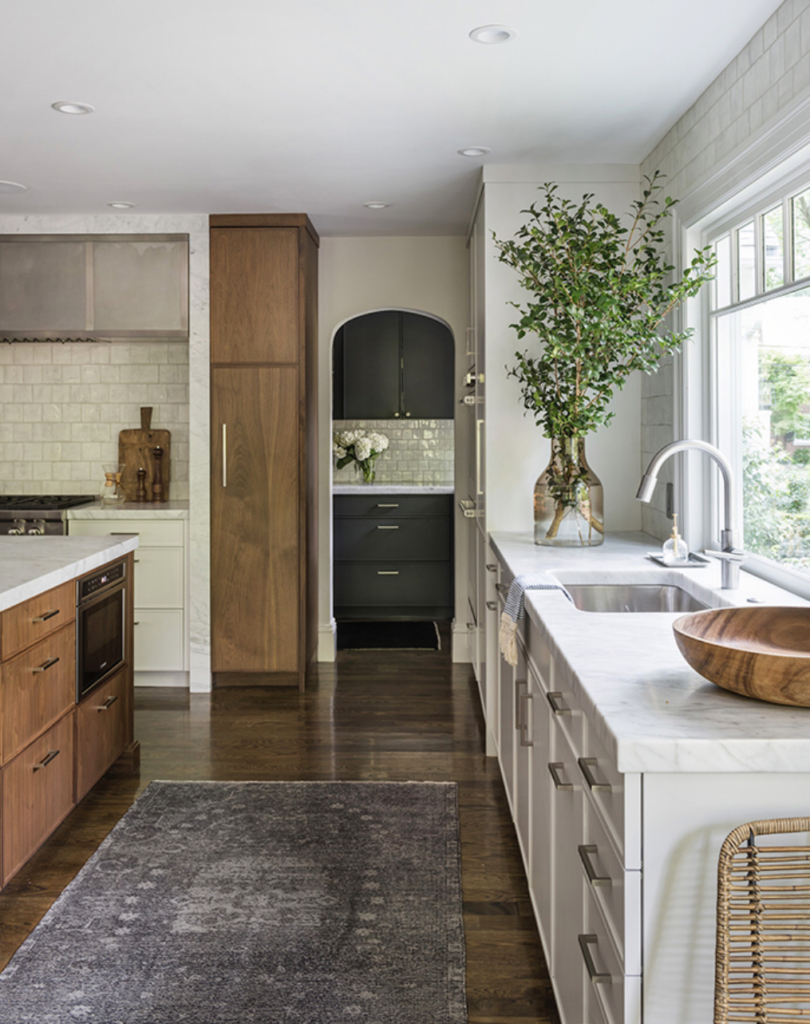
When we were in the planning process for our house, and of course working with a budget, we decided to cut down on some square footage and I was afraid that I would lose quite a bit of kitchen cabinet space. And we all know your girl needs some kitchen storage! I was not willing to sacrifice removing any of our big windows or doors in the great room, so I decided to push the kitchen, living, and dining spaces closer together and put in an open butler’s pantry (like you see in the picture above). At first, I also thought it would be a cool way to add more colors…I mean, three toned kitchen. How cool, right?
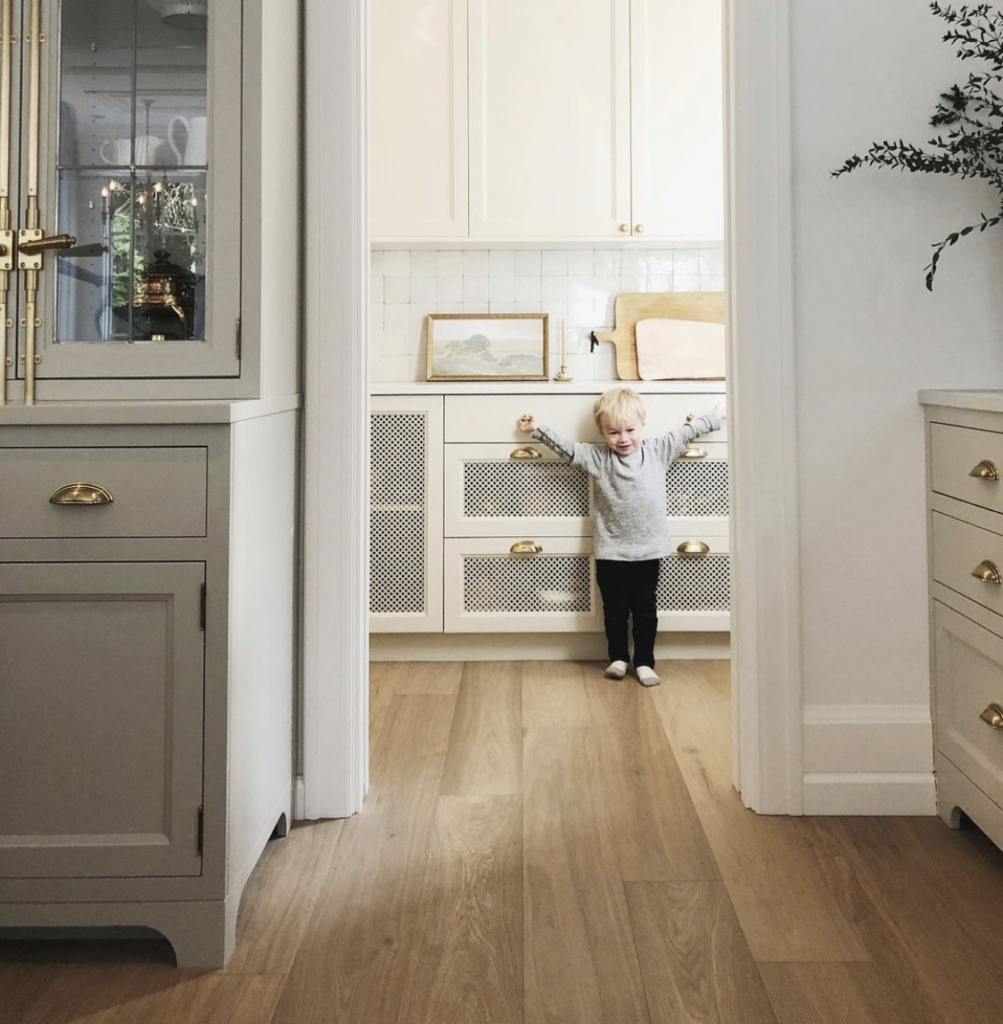
Well, when all the design decisions took 13 months to complete, you better believe I changed my mind a few times. In the end, boring neutral Emily came out, in fear that if I went too bold in a main space of our home I would get tired of it really quickly. So, when I came across this kitchen from Kimberly Jones, with the butler’s pantry matching the rest of the cabinet colors, I immediately fell in love. There were so many design elements that I saw in her kitchen that I knew I wanted in mine. Are y’all ready for all of the details? You’re about to hear exactly how much work it takes to plan a space like this, so let’s get into some renderings from Toni at Dovetail Design Studio.
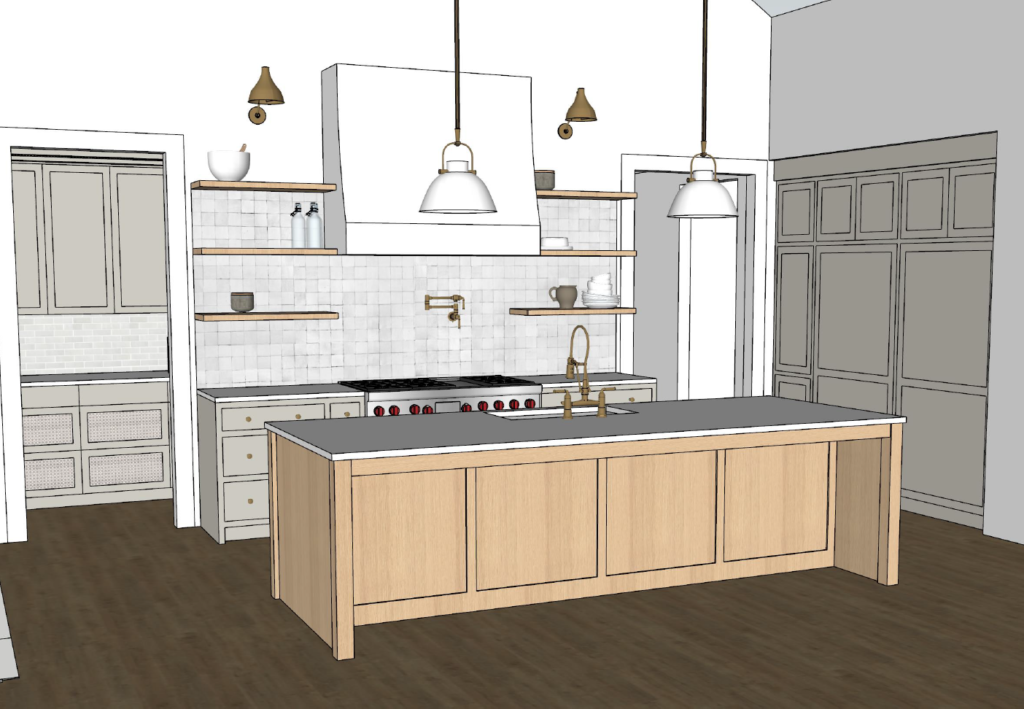
As you can see in the rendering above, we have our butler’s pantry on the left. There will be a doorway, but no door. The counter space will be used for things I don’t want to have sitting out on the counters in the main space. The extra cabinets will be great for housing entertainment items like serving platters and such. On the right, we have our built-in refrigerator and a little more storage, hiding our coffee maker, etc. Since we have quite a bit of space in the butler’s pantry, I was able to include these open shelves on the main wall. Some people may think that open shelving is crazy, but the more items are on-display, the more I am forced to keep them neat and tidy.
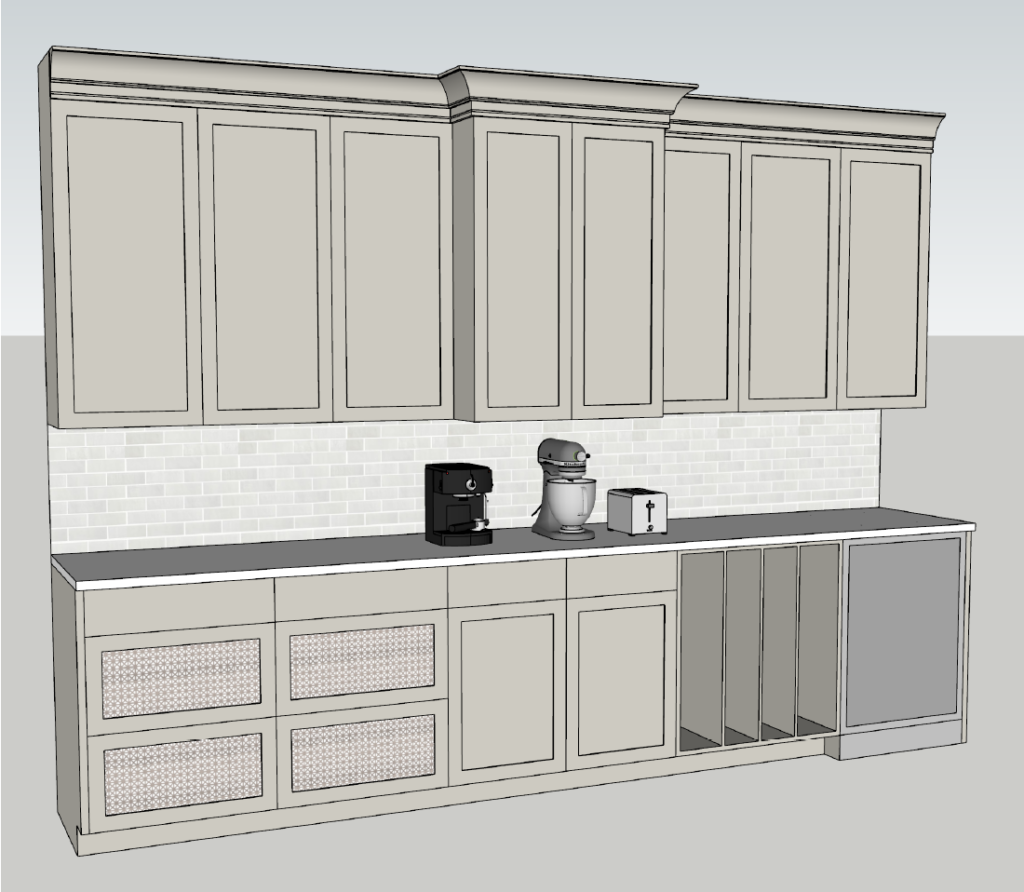
There were a few things that I wanted in our kitchen and a lot of them had to do with organization. Above is a picture of the storage setup in the butler’s pantry. This pantry will house our wine fridge, all baking pans, any small appliances, and our microwave (hidden behind cabinetry). We didn’t our microwave below the countertop (we are too tall for that!). We didn’t have a good space for it in the main kitchen area, so the microwave went in here and I am not mad about it. Now you may be thinking, but where will you put all of your food? Let’s go around the other side (around the corner from the right side of our range) and check out our pantry.
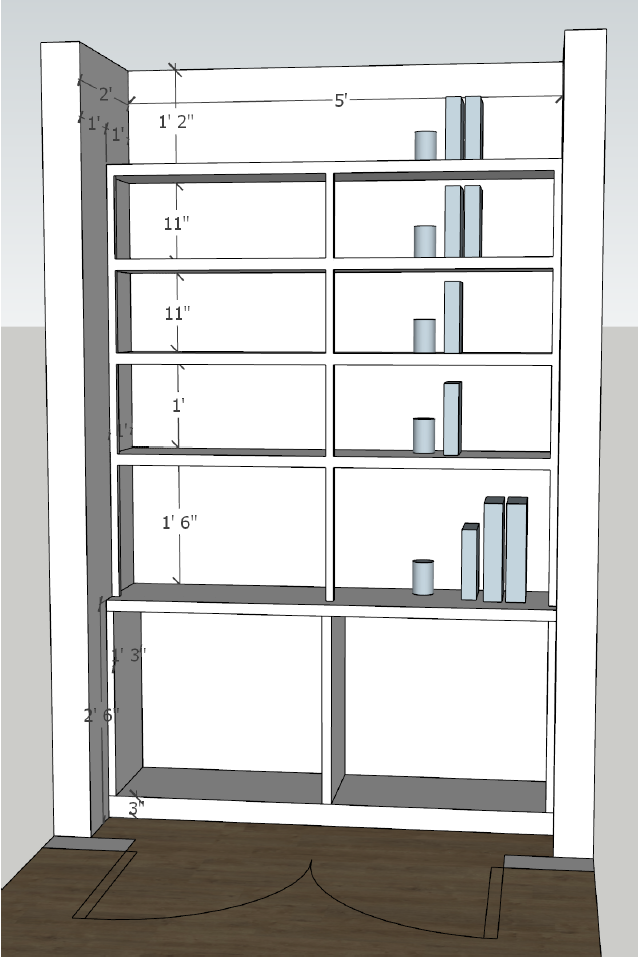
While this seems like a simple built-in, this actually required some food measurements on our end. Maybe that’s because my mom and I are super detail-oriented, but I’m sure we will be happy with the results of our obsessive planning. Okay okay, enough of the boring stuff. Let’s go back to design one last time while we take a look at all of the kitchen finishes.
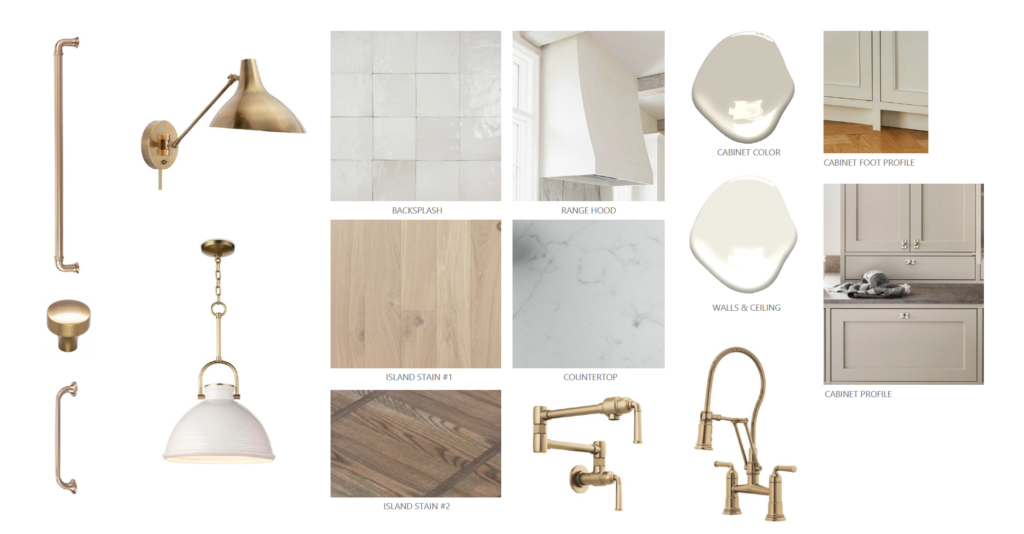
In the end, these were the finishes we chose, so let’s go through them from left to right. The three pieces on the left are the hardware for all the cabinetry. The top one is our fridge and freezer pulls and the bottom two we will be combining in the rest of the kitchen. As you saw in the first rendering, the gold finished lighting will be over the top of the open shelving on either side of the range hood and two of the white pendants will hang over the island. The square tile will be on the wall with the range and we will have a thin rectangular tile in the butler’s pantry.
The two wood stains are options for our kitchen island. We’re still somewhat doing a three-colored kitchen because the open shelving will match the light stain of the floors, the island will be more of a medium tone stain, and the cabinets will be painted cream-color. The range hood will be a really simple white plaster finish. The countertops are a marbled GRANITE? and both the kitchen faucet and pot filler will have a brushed gold finish. All of the cream-colored kitchen cabinets will have more of a finished furniture look with cabinet legs at the bottom.
Woah! Let’s take a breath. That was a lot, but how exciting is it to see everything come together from start to (almost) finish? I am ready to see this thing come together in real life and then host all of the things in this kitchen!


Leave a Reply